Water bath canning, or boiling water canning, is the desired method of canning used for high acid vegetables and fruits, pickles, and soft spreads. Water bath canning is the process of killing the unhealthy bacteria in foods by submerging them in a pot of boiling water. All foods contain bacteria, both harmful and helpful, but the harmful bacteria spreads if not killed. The high acid foods require a temperature that can be achieved with a 212°F boil, in a regular pot, as opposed to a low acid food that require pressure canning to maintain constant 240°F boil to kill bacteria.
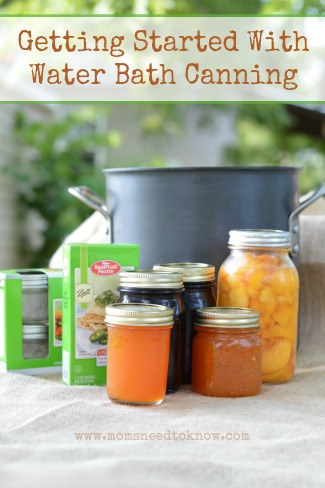
You should use a canner or large stockpot that is fitted with a rack that prevents the jars from touching the sides and bottom, filled with water, and brought to a boil. You can purchase a kit at many retailers that includes a Graniteware Canner and Rack for less than $20 (or a complete kit with all the tools that you need to get started with canning). If you already have a pot, a rack can be purchased separately for less than $10. If you do not have a rack, you can improvise with a kitchen towel pressed into the bottom. Never allow the jars to touch each other or the side of the pot!
You should regularly inspect your canner, lid, and rack for corrosion, dents, and pinholes. These can affect heat distribution and cause your foods to can at unsafe temperatures.
The water bath canner can also be used to heat and sterilize your jars. Always inspect your jars for nicks, chips, and cracks before use! Wash with warm, soapy water and mild soap. If a white residue is present on the glass, soak in a mixture of 1 part vinegar to 10 parts water and wipe with a soft cloth. Clean any ‘goo’ from previous canning uses from the rim.
Fill the canner half full with water and fit with the rack and bring to a boil. Reduce the temperature so that the water maintains a temperature of at least 180°F. Gently place your jars in the water, being careful not to splash water as they fill. Allow to simmer for at least 10 minutes. Remove and fill with hot, prepared recipe.
Once your jars are filled, wipe the rims with a clean cloth and fit with two piece caps (lids and rings). Make sure the rings are hand tight, anything looser will cause spillage. Bring water to a boil and carefully submerge jars. You should leave 1”-2” of boiling water over the tops of the jars. Cover the canner with the lid and process for the directed time stated in the recipe you chose.
When the jars are finished processing, remove with a jar lifter (priced at under $3 in most stores) and place on a towel. After the jars have cooled (8-12 hours), check them to make sure they sealed. Gently press down on the center of the lid, and if there is no give, the jars have sealed completely. If there is a give in the center, you may reprocess them within 24 ours of the initial canning.