


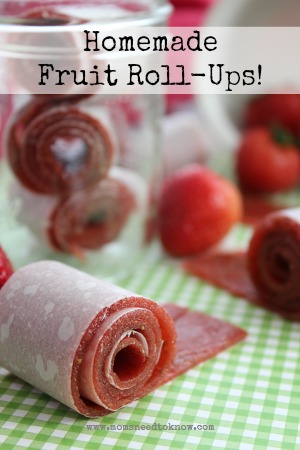
Do your children love fruit roll-ups but you don't want to give them to them because the ingredients list is way too long and impossible to pronounce? Well, what if I told you that my homemade fruit roll ups recipe has just 1 ingredient?
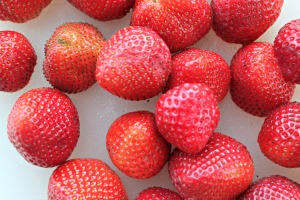
Yep! That's right. It's made from fresh strawberries and that is it! Of course, you can add a little bit of sugar if you like or while you are weaning your children off the store-bought ones (just gradually reduce the amount of sugar that you add each time you make them until eventually you are no longer adding sugar), but if you are buying strawberries when they are in season (or growing your own strawberries like we are doing this year), you really shouldn't need to add any sweetener!
These homemade fruit roll ups to require a bit of time to make and there really isn't any way to speed up the process. Just get them in the oven first thing in the morning to make sure that your oven is freed up in time o start making dinner!
To make them you will need:
Ingredients:
- 3 cups strawberries, stems removed
- sugar to taste (optional)
- Equipment needed: food processor or high-powered blender, plastic wrap, parchment paper, jelly roll pan
Directions:
- Preheat oven to 170F
- Line a jelly roll pan with plastic wrap, making sure that the plastic wrap goes over the sides of the pan.
- Puree your fruit in a food processor or blender until it has a smooth consistency. If your children are picky, you may want to run the mixture through a fine-mesh strainer to remove any seeds.

- If desired, add a little sugar to taste.
- Pour mixture on to prepared cookie sheet, about ⅛" thick.
- Bake at 170F for 6 to 8 hours. Your homemade fruit roll ups will be done when the center is firm and no longer tacky
- Remove cookie sheet from oven and lift/slide the plastic wrap off of cookie sheet and place on your counter top or a cutting board to cool.
- Once cool. place a piece of parchment paper on top of the cooked fruit and flip the sheet over so that the parchment paper is on the bottom.
- Carefully peel back the plastic wrap and discard.
- Cut into strips and roll up the fruit.
- Any leftovers can be stored in an air-tight container in the refrigerator for up to a week.


Enjoy!
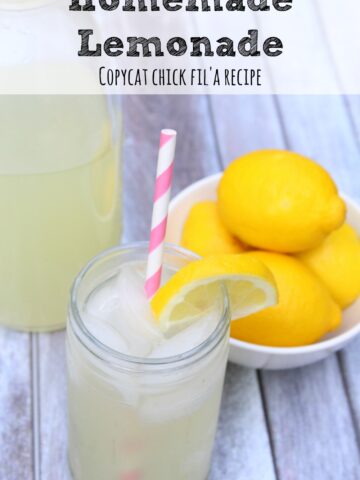
You may want to try these other copycat recipes:
- Copycat Starbucks Lemon Loaf Recipe
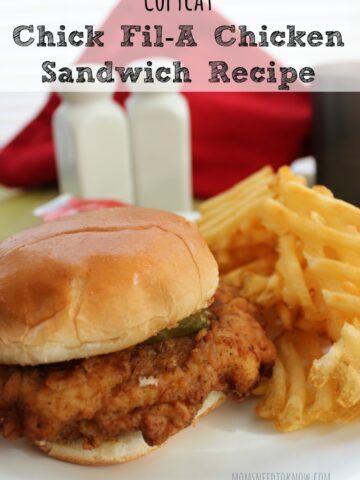
- Copycat Chick Fil A Chicken Sandwich Recipe
- Fried Apples Recipe | Copycat Cracker Barrel Recipe
- Bonefish Grill Bang Bang Shrimp | Copycat Recipe!
Ingredients
- 3 cups strawberries stems removed
- sugar to taste optional
- Equipment needed: food processor or high-powered blender plastic wrap, parchment paper, jelly roll pan
Instructions
- Preheat oven to 170F
- Line a jelly roll pan with plastic wrap, making sure that the plastic wrap goes over the sides of the pan.
- Puree your fruit in a food processor or blender until it has a smooth consistency. If your children are picky, you may want to run the mixture through a fine-mesh strainer to remove any seeds.
- If desired, add a little sugar to taste.
- Pour mixture on to prepared cookie sheet, about ⅛" thick.
- Bake at 170F for 6 to 8 hours. Your homemade fruit roll ups will be done when the center is firm and no longer tacky
- Remove cookie sheet from oven and lift/slide the plastic wrap off of cookie sheet and place on your counter top or a cutting board to cool.
- Once cool. place a piece of parchment paper on top of the cooked fruit and flip the sheet over so that the parchment paper is on the bottom.
- Carefully peel back the plastic wrap and discard.
- Cut into strips and roll up the fruit.
- Any leftovers can be stored in an air-tight container in the refrigerator for up to a week.

Celeste @Leapfrog and Lipgloss
This doesn't seem as hard as I thought it would be! I bet my girls would love this! Thanks for sharing!
Lindsey @ American Heritage Cooking
Is it bad that I want to make these for myself with no kids in sight?! All for me....okay, fine, and a few for the husband!
Jenny Marie
What a great and healthy snack. I would love it if you would share a post on my Meet Up Monday Blog Party!
http://jennymaire.blogspot.com/search/label/Meet%20Up%20Monday
Sarah C
Wow, this seems so easy! I am so going to make these soon! Thanks!
Kristina and Millie
How awesome! Should be healthier than the kind you buy and not to hard to make! Great recipe, appreciate your sharing! If you have time, hope you will stop by our Snickerdoodle Sunday sometime!
Andrea
Pinned! Thank you for sharing!! I love trying yummy chewing fruit in the first place 🙂 Thanks for linking up!
Krissy Allori {self proclaimed foodie}
Hi! Just letting you know that I'm selecting this post to be one of my favorites on this week's Wednesday Whatsits. The post with your photo and recipe featured will go live on Tuesday at 8pm PST. Come on by to see and keep on submitting! Thanks, Krissy
Lou Lou Girls
Hello cute lady! This looks so good. Pinned. Just to let you know, Jessica picked this as her favorite link and we will be featuring it at our party, tomorrow at 7 pm. Happy dance time!
Happy Sunday! Lou Lou Girls
Elizabeth
These look so good. My mom used to do this with peaches. Delicious!
Angela
This is a a great idea! thanks for the recipe- you're going to be featured tonight at Handmade in the Heartland so be sure to stop by!